
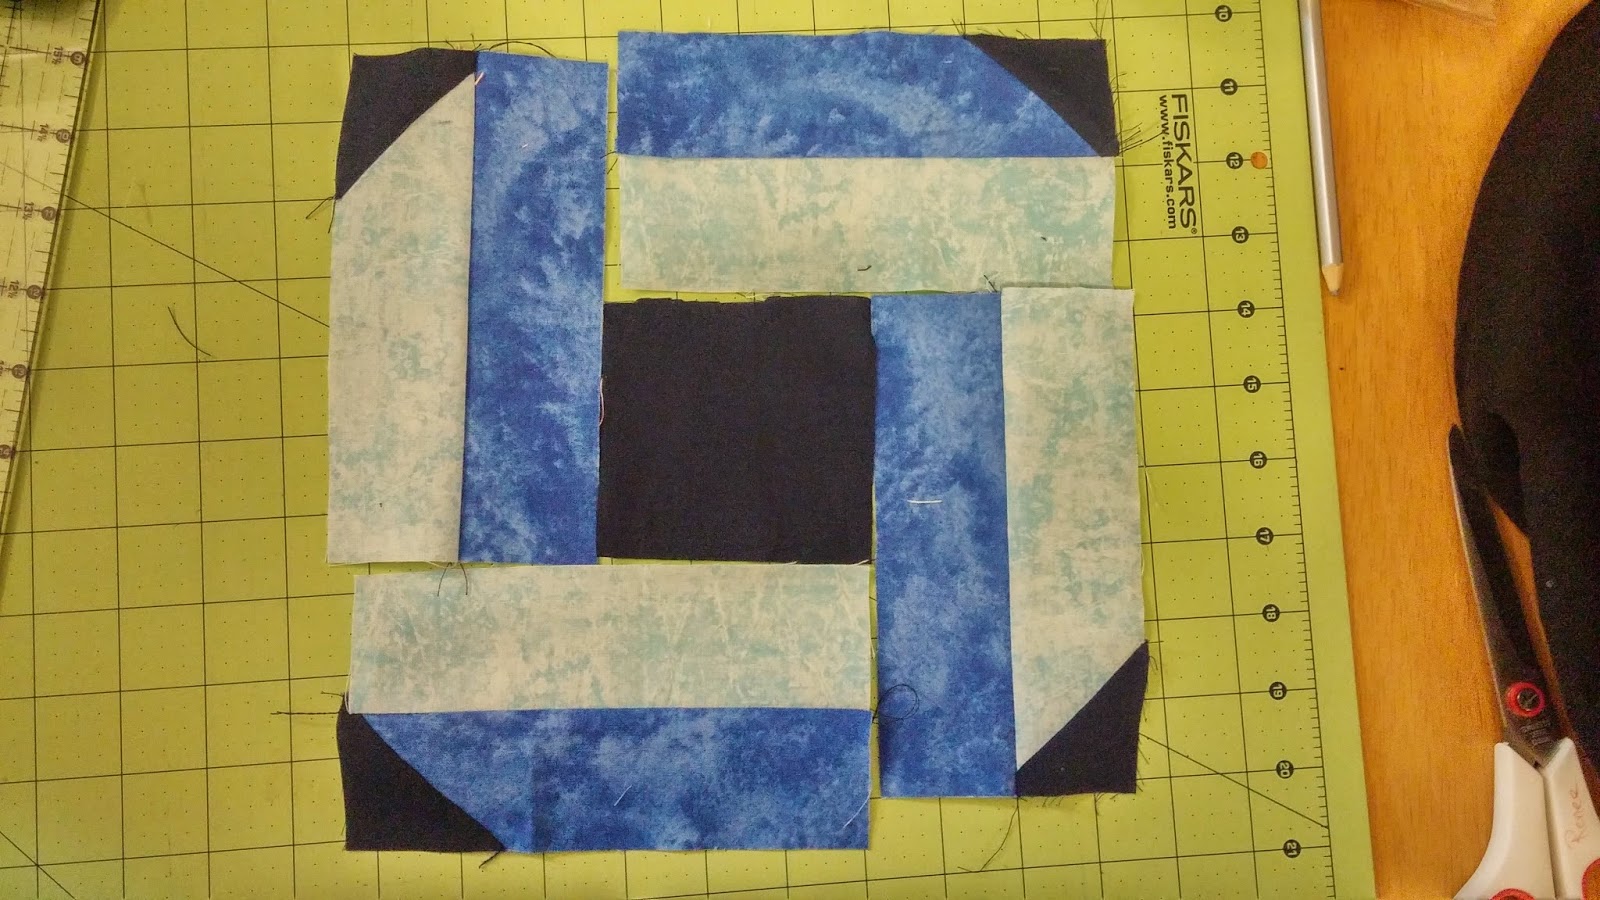
This is the basic block we will be building today.

It is important to note that these blocks are chiral - they can be right handed or left handed so if you want them all identical, you must make them the exact same way every time or you will end up with mirror images.
You will need three different fabrics for each block, a light, a medium/dark, and a background fabric.
From the light fabric, cut four 6.5" x 2.0" blocks.
From the medium/dark fabric, cut four 6.5" x 2.0" blocks.
From the background fabric, cut one 3.5" x 3.5" square and four 2.0" x 2.0" squares

Draw a guide line from corner to corner on the 2" x 2" squares.

Take two of the light pieces and two of the dark pieces and placing right sides together stitch corner to corner.

Trim to 1/4 inch from the diagonal seam.

Press the triangle towards the corner.

Next, stitch the remaining light and dark pieces to the opposite colored corner pieces. You should now have four partial blocks that look like this:

Take a edge piece and the center piece and lay right sides together and stitch about 3/4 of the way along the edge starting in the corner. Leave about one inch unstitched.


Press the seam towards the black. Now take the next piece, line up your edges, and stitch the entire seam.

Press your seam. Your block should now look like the one below.

Repeat for the next edge section.

Now we are at the slightly tricky part. You need to stitch on the fourth edge section without catching the first edge section.


And the block is done! Press the block and trim to 9.5" square.

That's all there is to it.
I personally like to set the blocks on point. I think it is easier to see the optical illusion when they are on point.

And then there is the option of sashing or no sashing, monochrome or multiple colors.


Here is my finished wall hanging.

I hope you have fun with this block! Please feel free to contact me with suggestions for making this tutorial better or questions you may have.
beautiful block, thanks for the tutorial. Always nice to see how things are made.
ReplyDeleteGreat tutorial.Thanks so much for posting this.
ReplyDeleteLove that monochrome version without sashing. Thank you for taking the time to do this.
ReplyDelete