Showing posts with label quilt. Show all posts

Sunday, August 31, 2014

Slow Stitching Sunday and August UFO

Looking forward to my extra day off tomorrow. We've got a few projects that we need to get taken care of around the house but I'm hoping they won't take too long.

My August UFO is my Kona Solids Sunset Quilt. I have 1/6 of the blocks made for this quilt and there are too many possible layouts to choose one. I suppose I will have to keep making the blocks and decide when I get them all done. However, I am having fun playing with my options.


And of course, some cross stitch updates.

Penguin Family - about 66% done.

Before
After
Look, you can see the little itty bitty baby penguin head start to crop up. Still not too happy with the white blending on the left pengiun, I'm hoping the further I get, the better it will look.

 The Fairy Spell - about 0.3% done.


Oh my goodness, so much confetti in these first few squares! There are at least 10 colors already on the canvas. I'm loving the way it is looking though.

I did get my floor frame ordered (yay for birthday presents!) but it will still be a couple of weeks until it ships. The frame I choose is handmade to order, and it is supposed to hold just about any size scroll frame, hoop, or q-snap. I'm excited!

My September Project 144 will be another short sleeved shirt for Jack. He keeps telling me how much he likes the one I finished last week. The next one will be out of black linen.

Linking up to Slow Stitching Sunday and August UFO.

Monday, February 11, 2013

Birds in Paradise 2.0

Hey everyone, don't have much time, just wanted to post a quick update.
I didn't like the center block of the Birds In Paradise by Nancy Bell (found in one of Carol Doak's books) so I drew the basic blocks in EQ7 and redesigned it slightly. I like it much better and this is the design I am planning on completing.
I'll be making each block 6 inches square. I especially love the secondary looping pattern made by the leaves.

Sunday, January 6, 2013

Bargello Table Runner


It was a busy weekend. This week is going to get a little chaotic so I'm not sure what will happen on the crafty front. This Friday is kind of make or break for Jack and I on the home front (pray for us please, if we don't pass inspection I'm going to go crazy. Bonkers. Hinky. Cuckoo). But if all goes well, my time will be my own again, without all kinds of crazy worry.

I spent the day sewing. I didn't even turn on my computer to play GuildWars. And I got a decent amount of stuff done. (Unfortunately tomorrow I have to go back to Mundania and work.) But I made excellent progress on my Project Linus quilt. The binding is machine stitched on and the only thing left is to finish hand-stitching it all up.
Bargello color sequence
I settled on a pattern for my bargello table runner. I was planning on making matching place mats but it seems I don't have enough fabric. I really haven't found any tutorials on bargello quilts that give you an idea of how much fabric they take. 16 strips of fabric will cover one long table runner or four place mats, but not both. Well the good news is I now have some idea how much fabric it takes! So I'm improvising. I'm making a short table runner and four place-mats, but the place mats will just be striped in the matching colors.
Table runner top
Place Mat
Honestly, I'm not sure I'm going to keep them. I was thinking about turning it into a table runner plus two matching place mat set. I chose the colors because I thought they would look good in our living room/dining room but somehow they just don't seem to mesh.


Monday, December 3, 2012

So I Guess Black Friday Isn't All Bad....

By Kaelyn Angelfoot

Jack and I spent the last three days outside in the cold patching our driveway (buku points to Cynar for dropping in to help!). Its days like those that make me turn to Jack and say "Sooooo... still sure you don't want to move to Miami?"

Let me just start by saying, finally, a Black Friday Sale I can get excited about. I hate the idea of standing out in the cold for three days and then dealing with the crowds and getting mugged to buy Christmas presents the day after Thanksgiving. I prefer a nice quiet vacation weekend.
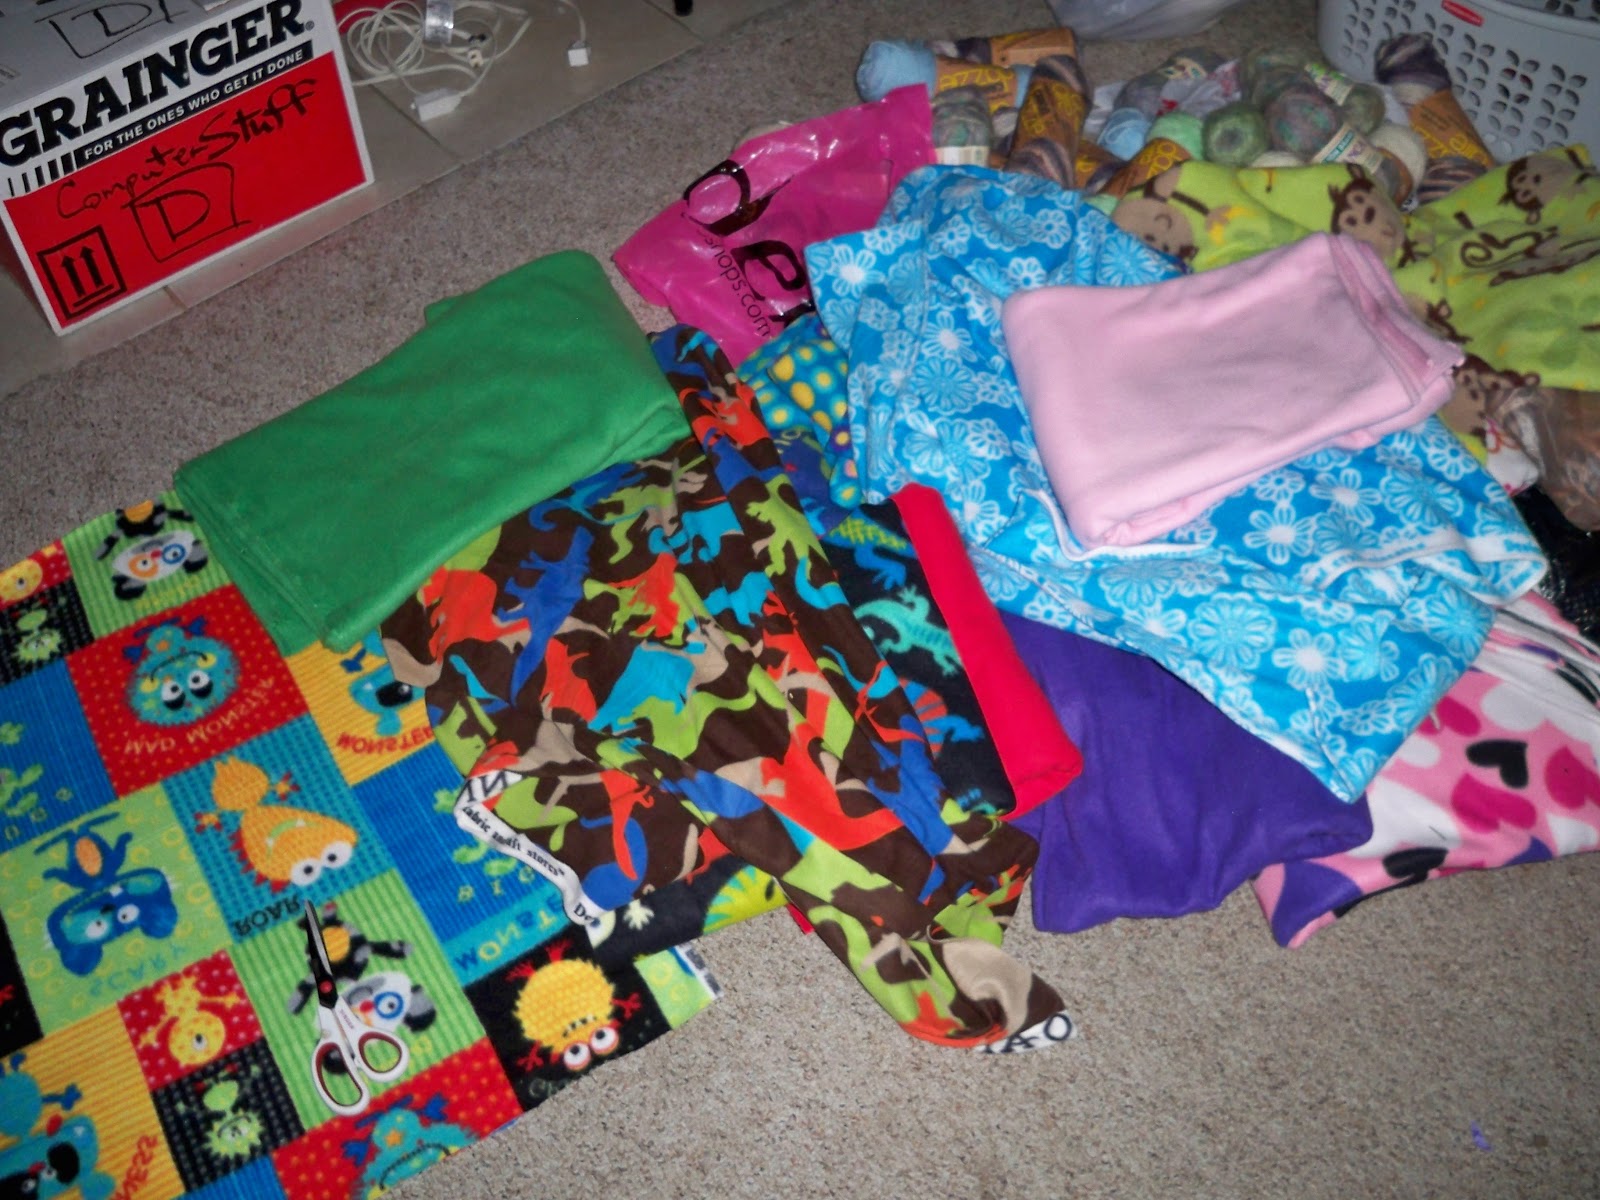
But...JoAnn's ran the world's best sale last weekend with fleece on sale for $3 a yard. Boom! I was there first thing Saturday morning (surprisingly, no crowds). Look what I got for less than $25.


I feel like I just won the lottery. That there is enough fleece to make about thirteen blankets of various sizes! Hello Christmas presents for my nieces and nephews.

I'm basing my blankets on this picture, from Project Linus:
And I already have two of them cut out. What I did was fold the paired fabrics in half and lay them on top of each other. I trimmed as necessary to make all side even and straight. From both the top and the bottom, I cut through all four layers using my rotary blade a strip nine inches wide. From this strip on the side with the raw edges, I cut off a nine inch square. Finally, on the large piece I cut another nine inch strip off the side with the raw edges. Do not ever cut the folded side. This left me with two blankets worth of fleece, the second being the inverse of the first.

Now I have to cut out three more sets and crochet them all together. Oh, and I only have two weeks for this whole thing.

 I've completed two blankets for Project Linus, the zebra striped one and one small monster baby sized blanket. 


The blue zebra blanket was practice. My crochet skills are rusty and minimal. This ended up being three rounds: 1) foundation single crochet, 2) single crochet, 3) double crochet, chain one, in every other stitch. It gave it a very nice crinkly look, I think in part because I used a larger crochet hook.

Friday, November 23, 2012

Project Linus: Day 1

By Kaelyn Angelfoot

So we had our first Project Linus day. Things didn't seem to go quite as smoothly as last year, but we still made some great progress. Rune made a no-sew fleece blanket with teal on one side and a really nice owl print on the other side. And I started my crochet-edged fleece blanket and worked on finishing my log-cabin triangle quilt.


The log cabin quilt is already quilted (I kept it basic, just traced the outline on the hexagons) and only needs the binding put on, which will be the same cream color as the background fabric. 

The crochet edged quilt is proving to be tricky. I seem to have overlapped my holes on occasion, which makes me glad that I placed them 3/4" from the edge as it give the edges a little more strength. I'll have to figure out a way to cut the holes more accurately next time. The skip-stitch blade worked very well, but I think the dense pattern of the fleece is what lent to the difficulty in cutting the holes.

JoAnns has their fleece on sale this weekend, at 2.99 a yard, so I'm hoping to pick some up early tomorrow and be able to experiment with it more.

So, just a quick update. I'll post the finished projects when they are done!

Friday, November 2, 2012

Project Linus: More Easy Blankets

By Kaelyn Angelfoot

Okay, here we are again, with some more easy, quick, and cheap blankets for Project Linus.

Crochet Edged Fleece Blanket


This is a very simple blanket that requires a length of fleece, cut to the correct dimensions, a special rotary cutter or something to punch the holes, yarn, and a crochet hook. I'm approximating that this blanket will cost $10 to make, due to needing to purchase yarn and fleece. The complexity of the crochet along the edges if up to you, but I imagine this will be much easier than a traditional afghan because the fleece will give significant stability to the crochet stitch. I'm thinking about picking up the special rotary cutting blade for this project. Here is another blog (Handcrafting with Love) with more details. (My apologies to whomever I borrowed the above images from. I forgot to bookmark the site when I saved the pictures. Email me if they are yours, please).

Depending on the color combinations and the crochet stitch chosen, this can result in some pretty awesome looking blankets. This method can also be used to finish off the edges of a pieced fleece quilt. (Skip-Stitch Idea Page)

FYI, I did some research on the special Skip-Stitch rotary blade and if you want to purchase one, I would get it from the original manufacturer. All the knock-off blades I've found received very low user reviews.

Project Linus: "Simple Gifts" Striped Quilt

This quilt pattern is provided by Project Linus as an easy, any size quilt. It is great for beginners and requires minimal cutting and piecing. You don't have to take the time to quilt it, instead you can "tie" the quilt layers together with embroidery thread.

The patterns requires a couple yards of fabric and can easily be made from fabric you already have or can pick up in the clearance section at the fabric store. For quilts, a 100% cotton material is preferred. Material should be washed and dried before using. It requires only nine pieces to make this quilt and the color and pattern combinations are endless. An additional expense would be quilt batting, the inner warm layer of quilts.

Sunday, September 23, 2012

My Quilting Table

By Kaelyn Angelfoot

Its been three weeks since my last post, so I've got a lot to update. I did start putting together my quilting table. Its pretty straight forward. I was inspired by one of the quilting websites I was on, (sorry, if I find the link again I will post it.)

What you will need to convert a home sewing machine to a quilting table are:

1. Insulation foam board (found at any home improvement store such as Home Depot or Lowes)

2. Electric bread knife (to cut the foam)

3. Clear plastic vinyl, found at JoAnns in the home decor/utility fabrics section.


This is the desk I'm converting to a sewing table. Its your standard student desk and it used to hold my computer. It won't be big enough to do a large quilt, but it should suffice for the projects I have currently. The surface is approximately 18" x 36".  I measured the depth of the sewing machine face at 3" so I purchased one sheet of 1.5" deep foam insulation.

The foam board is sold in 8' x 4' sheets, so if you pick some up make sure you have a way to get it home. I had to break the board in half along the score down the center and transport it as two 8' x 2' sheets.

When I got it home, I used the bread knife to cut one half sheet into two 2' x 3' panels. The excess 6" will stick off the back of the desk to give me a little extra surface area.


Next, I placed the sewing machine on the right side of the foam board, approximately where I wanted it to sit, and traced & cut out the outline of the machine's footprint. If I did anything wrong here, it was that the machine was set too far back on the table. Make sure it is a comfortable distance from the edge of the desk or you may find yourself overreaching when you quilt.


I layered the second piece of foam board underneath the first and traced the cutout. The I removed that nifty little sliding thingy on the left side of my machine and traced the new footprint onto the second piece of board, inside the original markings. I put X's where I did not want to cut.


Be careful with the bread knife. By the time I was done, mine was overheating and almost too hot to hold.

And, the end result:


Now I have a very large and even surface to quilt on! However, its not complete. The foam board was slightly warped, so I need to DAP the two layers together and put some weights on them, the end result will hopefully be a flat surface. Once that is completed, I will cover the entire thing with the clear high-gloss vinyl that I picked up. The vinyl is important because it allows the quilt to glide across the surface of the table with minimum friction. I also really don't like the pink, so I may try to cover it with some white or neutral toned fabric underneath the vinyl.

Total cost for supplies: $35ish. Plexiglass extension tables sold online and in stores are $50 - $100.  Add a custom built extension table designed to your machine's specifications and we're talking $150 - $300 depending on size. (There is a company that does this if you are interested.) All in all, I think my version is a bargain. And I still have enough foam board left over to double my surface area should that become necessary.

Thursday, September 6, 2012

Quilting Trials and Tribulations

By Kaelyn Angelfoot

I almost have my kaleidoscope quilt top completely pieced together. It is still lacking a complete border, but that should be remedied shortly.

It occurred to me that despite having semi-decent skills at piecing quilt tops together, I have very little experience with the actual quilting process. So I put together some old scraps from half finished projects, and I plan to practice free motion quilting on them. The first is the remaining kaleidoscope quilt blocks assembled, and the second was originally going to be a pillow case.


Doll quilt from kaleidoscope scraps


I still need to finish adding a border onto this quilt before I can layer and quilt it.

The other one is purple, and I've already started quilting it, but I ran into several snags. First, I choose a complicated pattern, because I have epic faith in my abilities. Here is the stencil I created from an image I found online.

Star quilt stencil
Pretty cool, huh? Its going on a strip-pieced quilt made up of various purple material. One of the fabrics used has a shooting star pattern.

Star doll quilt, in progress

 Which brings us to problem numero uno. My magic blue washout marker only shows up decently on the pale lavender fabric and the dark purple fabric, making it very difficult to determine where to stitch next. I plan on combating this by using a white or red chalk pencil to retrace what is illegible.

Close up of not-so-great quilting
Problem number two is that this pattern really requires a free motion quilting style, as opposed to the walking-foot straight stitching I was attempting to complete. There are a large number of starts, stops, and turns with this pattern and that fact coupled with the hard to see lines made my attempts at quilting extremely time consuming, very frustrating, and the end result was not pretty. There are wavy lines, skipped stitches, and crummy-looking starts and stops with overlapping stitches.

I have gotten my hands on a free-motion quilting foot and spent several hours watching how to videos on quilting. What I learned was that I need to take a step back and rethink my sewing set up, because quilting is vastly different from sewing garments. I also need my setup to be easily removable, since I still plan on sewing large quantities of Dagorhir garb in the near future. I have several ideas which I can hopefully put together this weekend.

Stay tuned! More updates to come.


Thursday, August 23, 2012

More Hexagons! Log Cabin Snowflake


 By Kaelyn Angelfoot

Quilt in a box!
Since I'm never satisfied with just one project, I've started yet another quilt. This one is another paper-pieced log cabin variation. The pattern was downloaded free from CompuQuilt, and is copyright them. I've provided a link to it as I cannot repost without risking copyright violations.

I actually started this quilt prior to the kaleidoscope one, and I ended up using fabric I had on hand. It was just luck that I had purchased all thirteen fabrics for a couple of different quilts that never made it past the planning stage. I had exactly enough in each color to make a jewel-toned log cabin. I also find it amusing that I can fit an entire quilt into a shoebox. It took a decent amount of experimentation to find the correct strip size for each piece. I ended up erring on the generous side, see the table below for the sizes I used.

There are several different choices for block arrangement. I chose what I have come to call "snowflake." This quilt would be gorgeous with the two matching sides in blue and the third side in silver to make a winter themed quilt.


Close up of block arrangement


The finished block will be approximately twelve inches across. I will need a minimum of twenty blocks to make a decent sized lap quilt, or 120 triangles. The only question is whether I have the patience to make a quilt that large. As you can imagine, its a very time consuming block to make. The pattern has thirteen pieces per triangle.

Layout of final quilt

Monday, August 20, 2012

Kaleidoscope in Outer Space II

By Kaelyn Angelfoot

It took almost three hours to settle on a final arrangement for my kaleidoscope quilt. There were problems with the colors. Part of the space fabric was a teal Saturn-like planet surrounded by lavender. Because of the way the blocks were cut out, these teal and lavender creations just didn't seem to mesh well with the rest of the quilt. I was unable to come up with a satisfactory arrangement that included them. After removing them from the layout, I came up with the following design which I am very happy with.

 
Final kaleidoscope quilt arrangement
I am piecing the quilt together in long strips, very carefully, as this is not a forgiving block. Small errors result in large issues with combining the various blocks. I was forced to discard a couple of blocks that had errors in the seams which caused the hexagon to be less that 360 degrees when completed. At the top and bottom of each strip I have added a black triangle that I will trim to make a straight edge. I was also unable to come up with a satisfactory arrangement that would allow me to make two quilts - there just aren't enough blocks. This one will be a lap-size when completed.

One thing I strongly recommend is taking pictures (like the one above) of your final layout. I have already had to refer to this a couple times to make sure I'm putting the hexagons in the correct order while piecing. 

Wednesday, August 15, 2012

Paper Piecing: Tips for Funny Angles

By Kaelyn Angelfoot

My newest project is paper-piecing. I love the space quilt I'm working on so much I decided to experiment with the fabric a little further. I choose a pattern from "101 Log Cabin Blocks" published by DRG. The pattern I selected was named "Vertigo" and can be found on page 26.

First of all, I had to make copies of the pattern. Because the pattern was in a bound book, I decided to cut the pattern page out of the book so that it would lay flat in my copier. The next thing I noticed is that the copier was feeding paper at an angle, so my blocks were printing slightly crooked. I was eventually able to compensate for this. It is very important to check your printed patterns against a square before you begin sewing.


The first thing I learned was that it is nearly impossible, due to the unusual angles of this block, to line up your fabric strips by sight. I ended up developing an easy system to compensate, which greatly reduced both fabric waste and time needed.

As you can see from the picture, once I got to a certain point, it was very difficult to determine where to lay the next strip.

To help me line up your fabric strips, I flipped the pattern over so the back was showing and placed a pin at either end of the pattern line that will be stitched.

Then I flipped the pattern over to the front and placed two pins in the top of the pattern where the pins from the back were showing through and removed the back pins.

Finally, I laid fabric strip so that it lined up with where the pins enter the fabric, then shifted it up to cover the pins by approximately 1/4", pinned in place and stitched!

The final block is 7" x 7", with a half inch seam allowance. I will trim the seam allowance down to 1/4" before I stitch it to other blocks.